
[프로젝트] GitOps 설정 (Github Action Workflow, Branch Protect)
1. Workflow
Create FastAPI App
# src/main.py

# pip install uvicorn
# pip install "fastapi[all]"
# uvicorn src.main:app

from fastapi import FastAPI

app = FastAPI(
    title="FastAPI - Hello World code",
    description="This is the Hello World of FastAPI.",
    version="1.0.0",
)


@app.get("/")
def hello_world():
    return {"Hello": "World"}
# tests/test_main.py
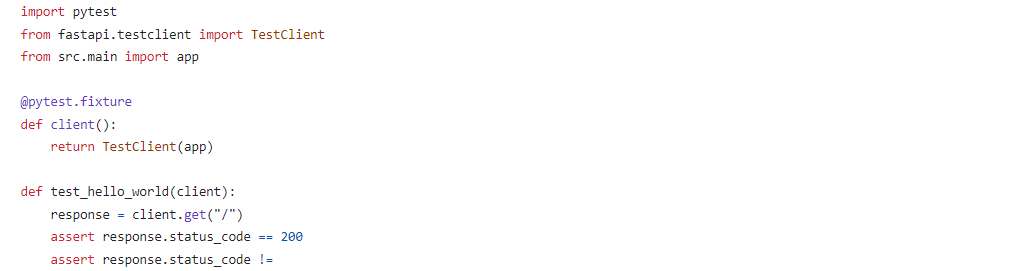
import pytest
from fastapi.testclient import TestClient
from src.main import app
@pytest.fixture
def client():
return TestClient(app)
def test_hello_world(client):
response = client.get("/")
assert response.status_code == 200
assert response.status_code != 500
assert response.json() == {"Hello": "World"}# requirements.txt
Flask
uvicorn
fastapi
httpx간단한 FastAPI app과 Test 파일을 추가한다.
Github Action Workflow

set up a workflow yourself를 눌러 새로운 ci 파일을 만든다.
# This workflow will install Python dependencies, run tests and lint with a single version of Python
# For more information see: https://docs.github.com/en/actions/automating-builds-and-tests/building-and-testing-python

name: Python application

on:
  push:
    branches: [ "main" ]
  pull_request:
    branches: [ "main" ]

permissions:
  contents: read

jobs:
  build:

    runs-on: ubuntu-latest

    steps:
    - uses: actions/checkout@v3
    - name: Set up Python 3.10
      uses: actions/setup-python@v3
      with:
        python-version: "3.10"
    - name: Install dependencies
      run: |
        python -m pip install --upgrade pip
        pip install flake8 pytest
        if [ -f requirements.txt ]; then pip install -r requirements.txt; fi
    - name: Lint with flake8
      run: |
        # stop the build if there are Python syntax errors or undefined names
        flake8 . --count --select=E9,F63,F7,F82 --show-source --statistics
        # exit-zero treats all errors as warnings. The GitHub editor is 127 chars wide
        flake8 . --count --exit-zero --max-complexity=10 --max-line-length=127 --statistics
    - name: Test with pytest
      run: |
python -m pytest tests공식문서를 참고하여 workflow 파일을 작성한다.
크게 name, on, permissions, jobs로 나누어 작성한다. jobs에서는 최신 ubuntu 환경에서 각 소스 코드를 체크아웃하고 python을 설치하고 종속성을 설치했으며, flake8을 이용하여 코드 린팅을 수행하고 pytest로 테스트를 수행한다.
작성한 workflow 파일을 첨부한다.
Test
CI 코드가 잘 작동하는 모습을 확인할 수 있다.
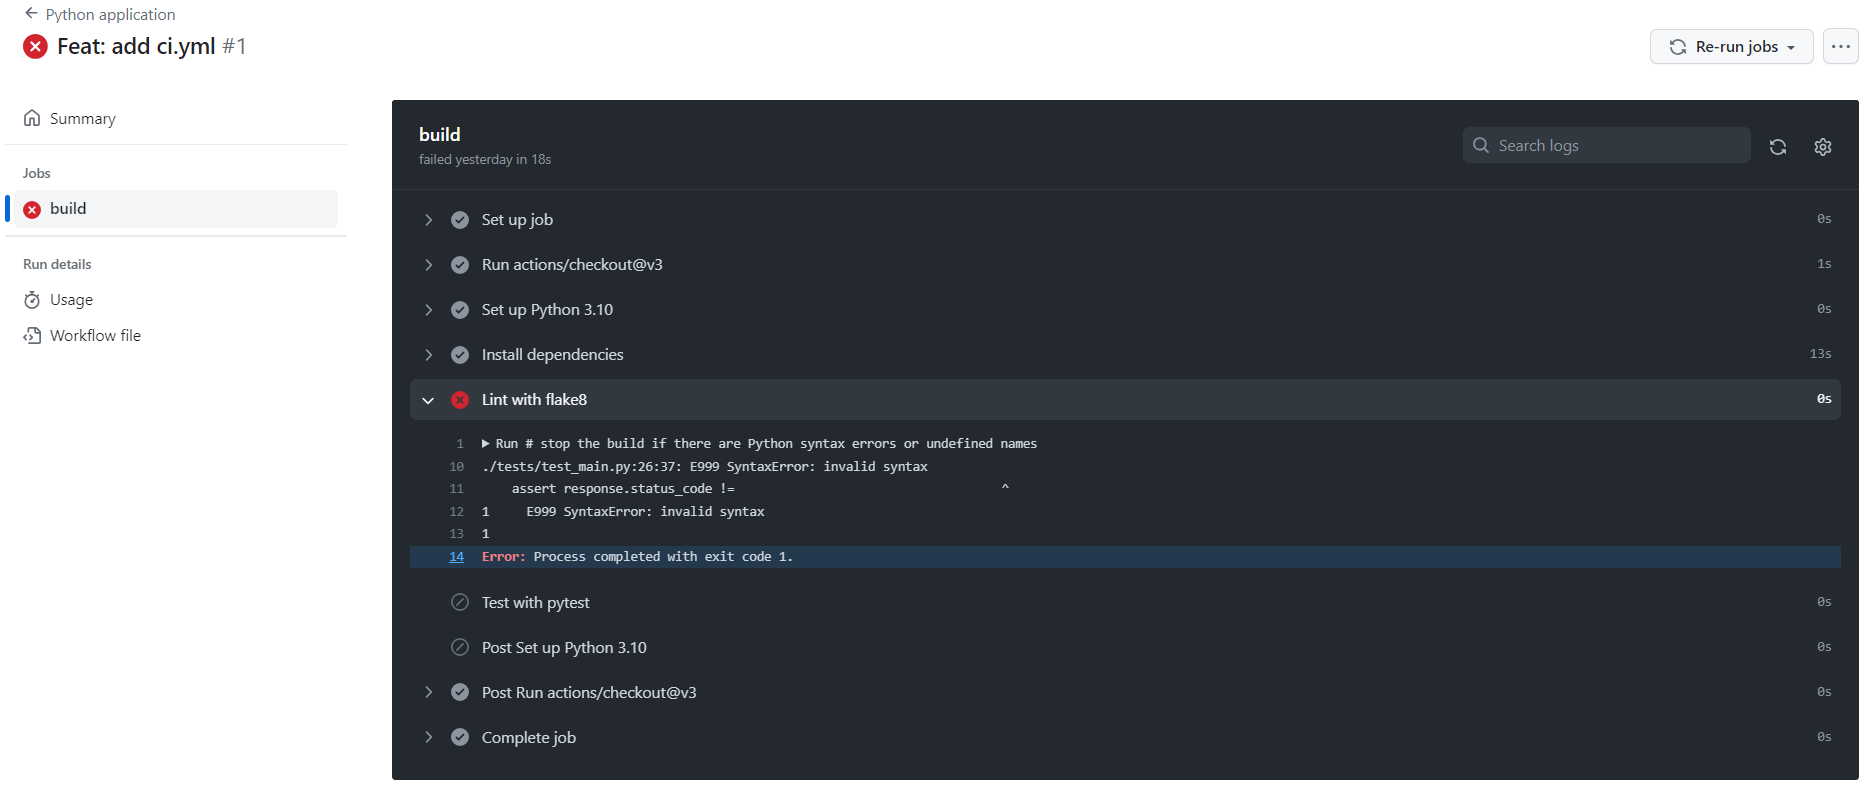
만약 소스코드가 잘못되었다면 test fail이 뜨는 모습을 확인할 수 있다.
2. Branch Protect
Add Branch Protection Rule
Repository > Settings > Branches > Add Branch Protection Rule 을 실행한다.
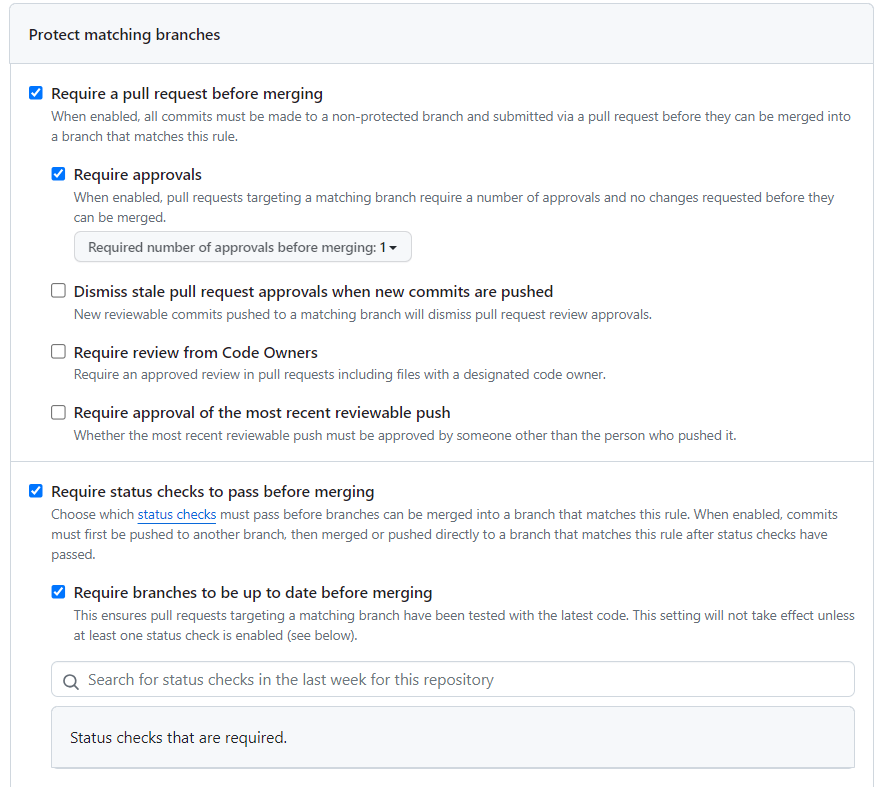
소스 코드 병합 전에 1명 이상의 approval을 받고, 가장 최근 코드로 status check를 받아야 한다.
3. Issue Test
Repository > General > Features > Issues > Set up templates로 이슈 템플릿을 먼저 만든다. (템플릿을 만들때는 branch protect rule을 잠시 끈다.)
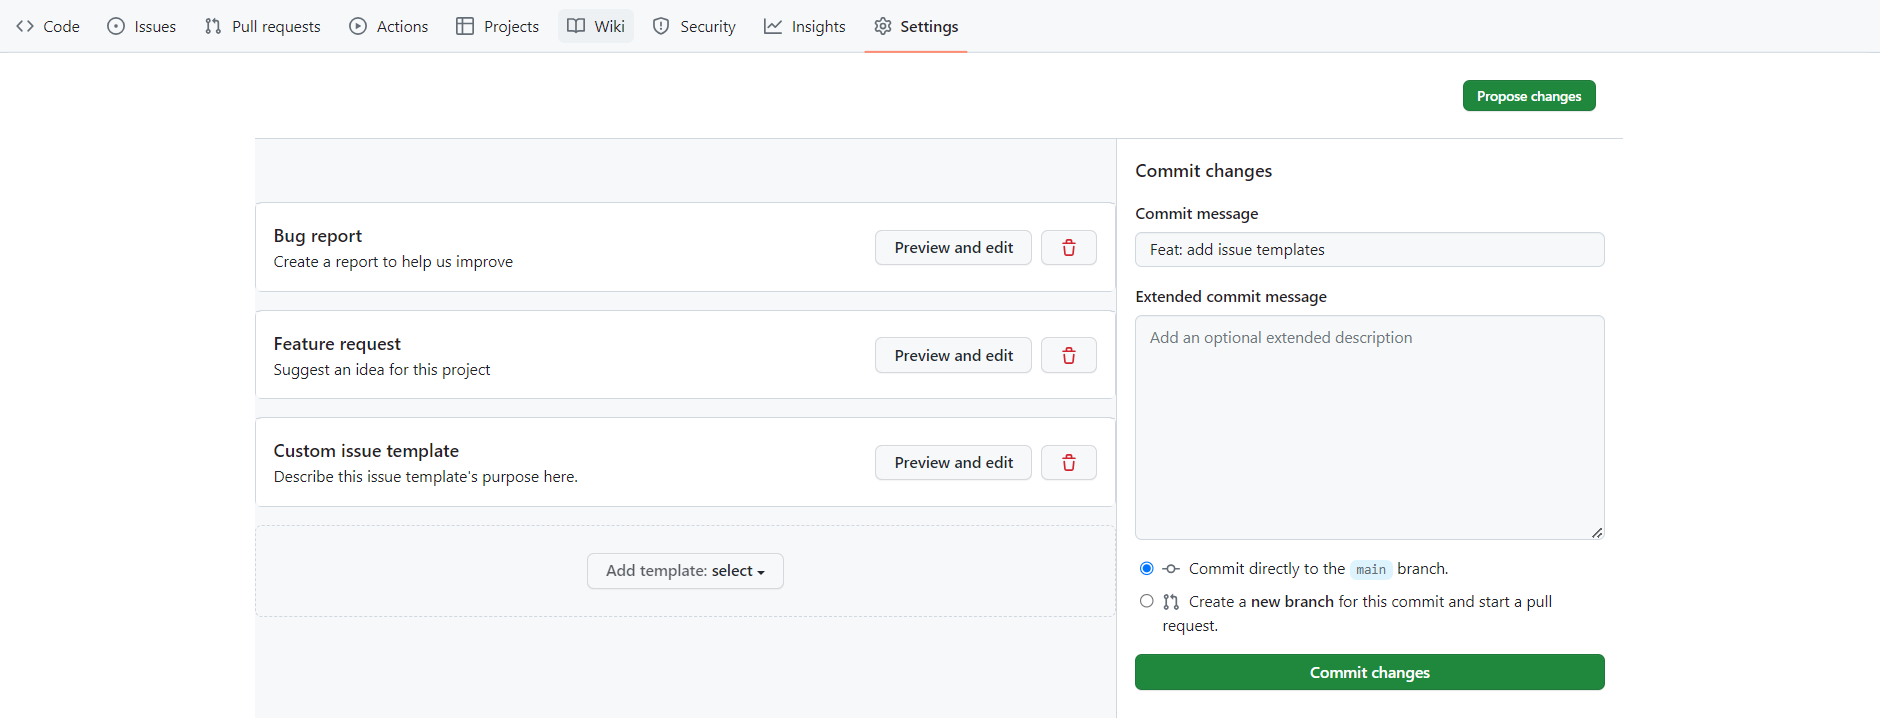
기본 template 3개를 선택했다.
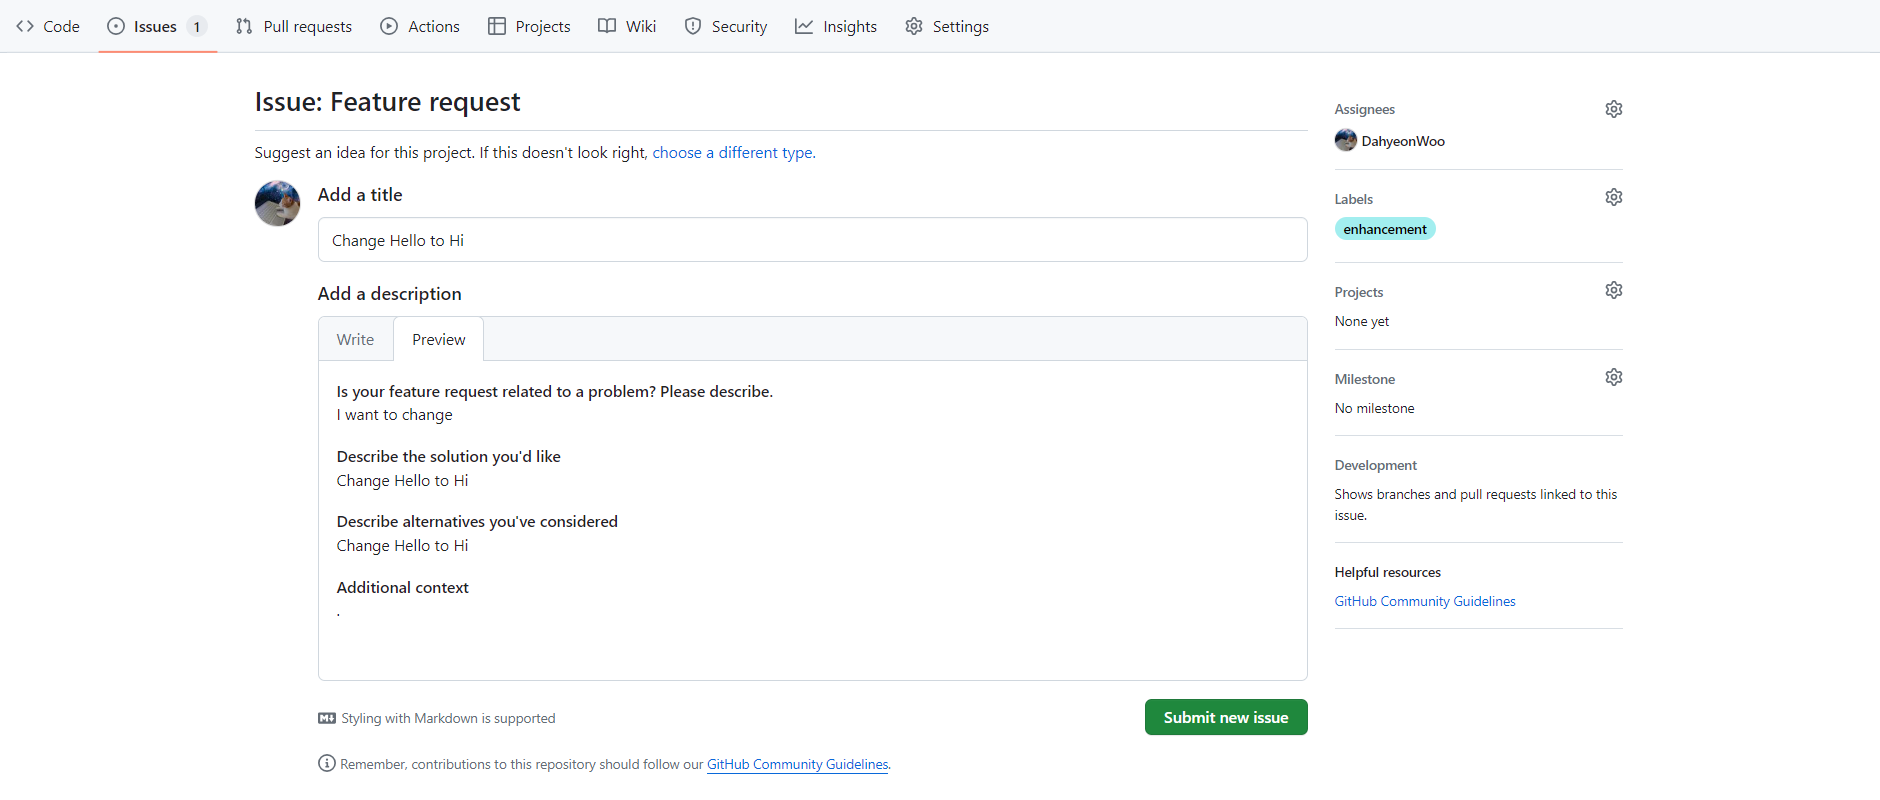
Hello를 Hi로 만드는 Issue를 생성했다.
issue 처리를 위한 branch를 생성하고, branch를 fetch하고 src/test 코드를 작업한 후 push했다.
4. PR Test
Issue와 마찬가지로, PR 템플릿을 먼저 만든다. (템플릿을 만들때는 branch protect rule을 잠시 끈다.)
Github에서 .github 하위에 pull_request_template.md라는 파일을 만든다.
파일의 위치와 관계 없이 이름이 일치하면 정상적으로 동작한다.
## Overview
<!---- Resolves: #(Isuue Number) -->

## Content
- [ ] Add Features
- [ ] Fix Bugs
- [ ] Configuration
- [ ] Docs
- [ ] Style
- [ ] Code Refactoring
- [ ] Test
- [ ] Design

## Checklist
- [ ] You kept the Commit Message Convention.
- [ ] You have tested the changes (test for bug fixes/features).
간단한 PR template을 작성해보았다.
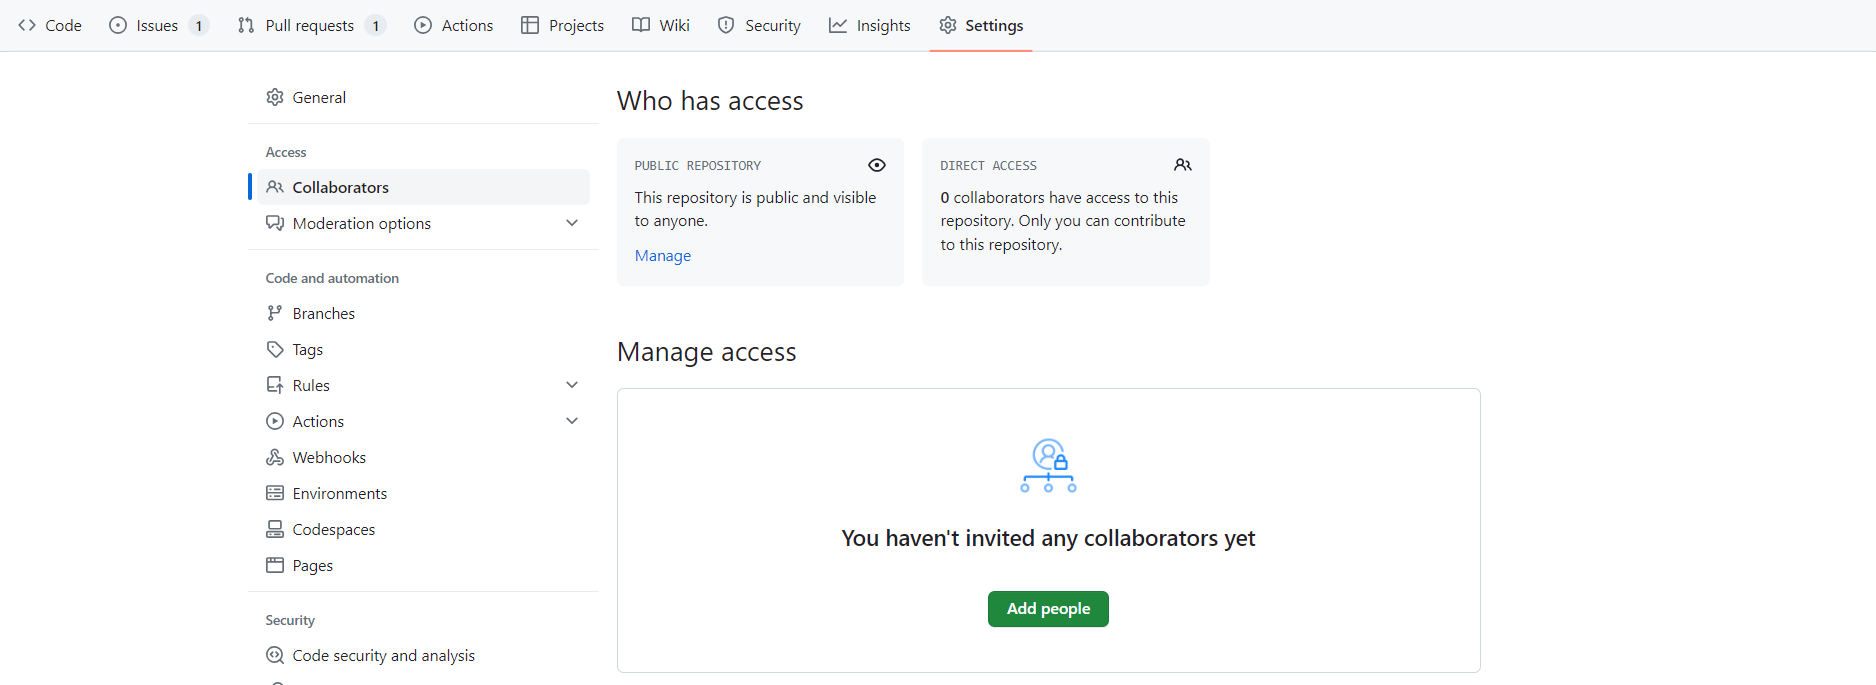
Code Review를 받기 위해 Collaborator에 리뷰어를 추가한다.

이후 PR을 template으로 생성하고, Github Workflow 자동 수행/검증을 확인했다.
Overview에 #1를 입력하여 1번 이슈를 연결했는데, 이러면 PR이 Merge되었을 때 Issue도 함께 해결이 됨을 확인할 수 있다.
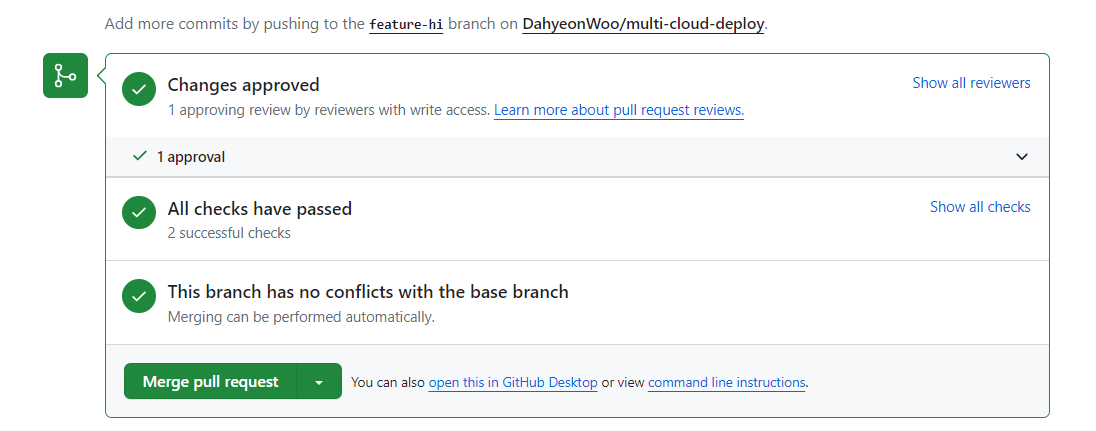
Review를 받고 Approval 되어 Merge를 수행했다.
Merge 후 branch 삭제되었고, Issue가 자동 close된 것을 확인했다.
브랜치 보호 규칙이 적용된 리포지토리에 PR 후, CI가 동작해 자동으로 Linting과 Unit test를 수행하고, 동료의 코드 리뷰 후 main 브랜치로 merge 한 다음, issue를 close하는 전형적인 오픈소스 프로젝트 과정을 수행해보았다.